
Smarter by Design.Simpler for Business
TACACS Settings
What Is TACACS Settings?
TACACS Settings is the screen on which the integration required for the identity of the TR7 administrative users to be authenticated over a TACACS+ server is configured. When TACACS is selected as the Authorization Source while a device user is being added, the password of the user is authenticated against the TACACS+ server defined on this screen; the password is not stored on TR7.
In addition, by enabling Accounting, the records belonging to the management sessions can be sent to the TACACS+ server.
Server
Connection
The TACACS Host and Port
Secret
Shared secret
The TACACS Secret
Accounting
Accounting
Sending the session records
Cluster Behavior
In the TR7 installations running as a cluster (two devices), when the TACACS settings are changed on one device, they are automatically synchronized with the other TR7 device; there is no need to set them separately.
The related screen
When TACACS is selected as the Authorization Source while a device user is being added, the authentication is done over the TACACS+ server on this screen. The automatic creation of the user at the first successful TACACS login can be turned on with Automatic User Creation under Device Users → User Management Settings.
What Is It For?
Authenticating the identity over a central TACACS+ server connects the management access to the corporate AAA infrastructure. This approach provides the following:
- The password is not stored on TR7: the authentication is done against the TACACS+ server every time,
- Central account management: the users are managed from a single point; there is no need to open a separate account on every device,
- The corporate password policies (complexity, validity period, locking) are applied centrally,
- The access is in sync with the center: when the account is closed on the TACACS+ side, the TR7 access also ends,
- Session recording (accounting): when Accounting is enabled, the management sessions are recorded on the TACACS+ server.
How to Edit?
The TACACS settings are edited via the TR7 web management interface with the steps below:
- The Configuration Menu is opened by clicking the TR7 logo at the bottom left.
- The steps Settings → User Management → TACACS Settings are followed.
- By clicking the Edit button, a closable editing tab is opened.
- The related fields are updated according to the requirements.
- The changes are saved by clicking the
Savebutton.
TIP
Reaching the page via quick search
Instead of navigating the menu step by step, the related page is reached directly by using the search bar in the bottom left corner of the screen. The search bar opens with the Alt + T shortcut on Windows and Opt + T on macOS; typing the name of the feature being searched for is then sufficient.
The TACACS Settings Screen
By following the path Settings → User Management → TACACS Settings, the TACACS integration information belonging to the TR7 device is displayed. The screen is read-only and shows the TACACS Host, TACACS Port and Accounting (Enabled / Disabled) rows; the TACACS Secret is never displayed on this screen for security reasons. The two entries at the top are Edit and Check TACACS Connection.
 The TACACS Settings Screen
Button Details
By clicking the Edit button, a closable editing tab in which the TACACS settings are edited is opened.
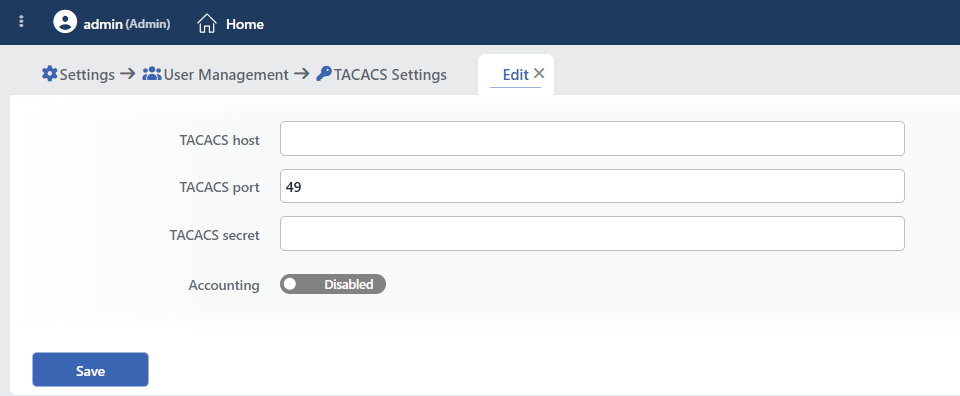 The Edit Tab
INFO
TACACS Host
The IP address or the domain name of the TACACS+ server is entered; the port information is not written in this field.
INFO
TACACS Port
The port the TACACS+ server listens on is entered. The field comes with the 49 value by default; if an invalid value is entered, it is pulled back to 49 while saving.
INFO
TACACS Secret
The shared secret key defined on the TACACS+ server is entered. It is used in the encryption of the communication between TR7 and the server and it must be the same on both sides.
INFO
Accounting Default: Disabled
It is an on/off switch; while it is off, Disabled is written on it and the sub-fields are not displayed. When it is enabled, the accounting records belonging to the management sessions are sent to the TACACS+ server and the following five fields appear.
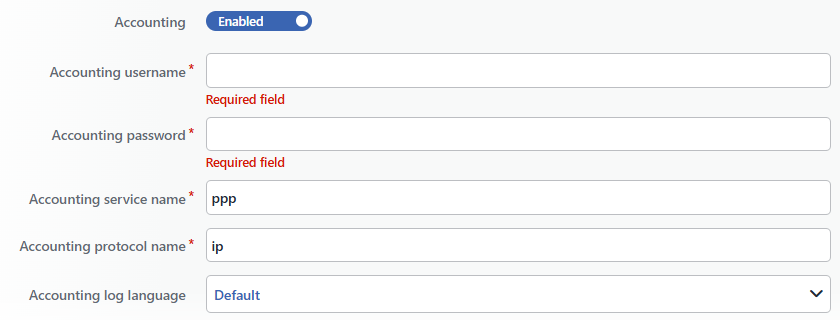 While Accounting Is On
Accounting Username Required
The user name to be used for the accounting records is entered.
Accounting Password Required
The password to be used for the accounting records is entered.
Accounting Service Name Default: ppp
The service name (the TAC+ service value) to be used in the accounting records is entered; the field is required. While typing, a suggestion list is offered: shell, arap, ppp, slip, tty-daemon, connection, system, firewall, cmd, enable, login.
Accounting Protocol Name Default: ip
The protocol name (the TAC+ protocol value) to be used in the accounting records is entered; the field is required. While typing, a suggestion list is offered: ip, ipx, telnet, rlogin, http, ftp, scp, snmp, atalk, vines, lat, xremote, tn3270, pad, vpdn, deccp, osicp, unknown.
Accounting Log Language
In which language the accounting records (the session events) will be sent is selected; if no selection is made, the system default language of the device is used. Every user operation is delivered to the TACACS+ server together with the service name, the protocol name, the log identity and the log text in the selected language.
The TACACS Connection Check
By clicking the Check TACACS Connection button, whether the TACACS+ server can be reached or not is tested with the entered host/port and secret (if Accounting is on, the test is done with the accounting information). As a result of the operation, the information that the connection is successful or failed is shown.
Failed
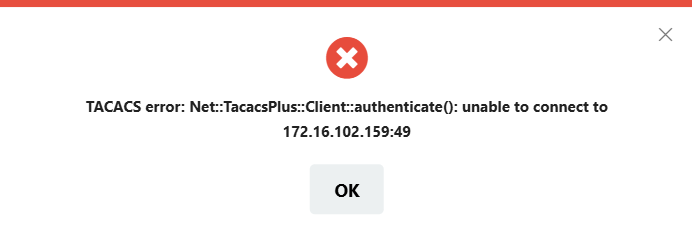 The Connection Check: Failed
Successful
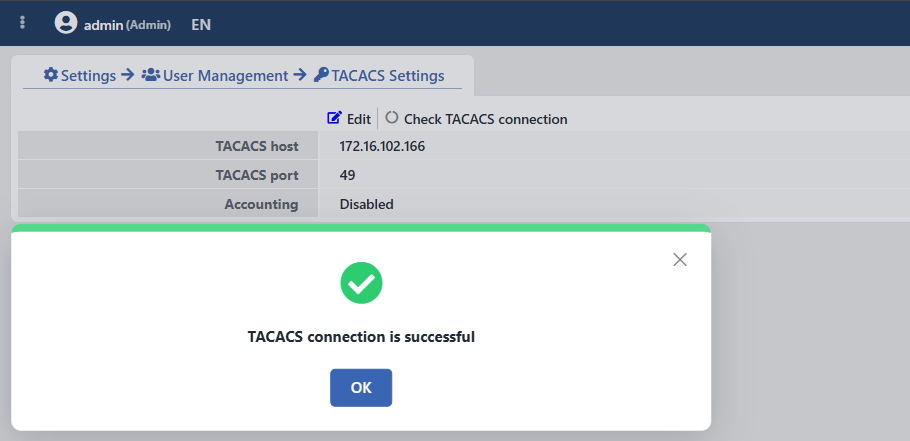 The Connection Check: Successful
